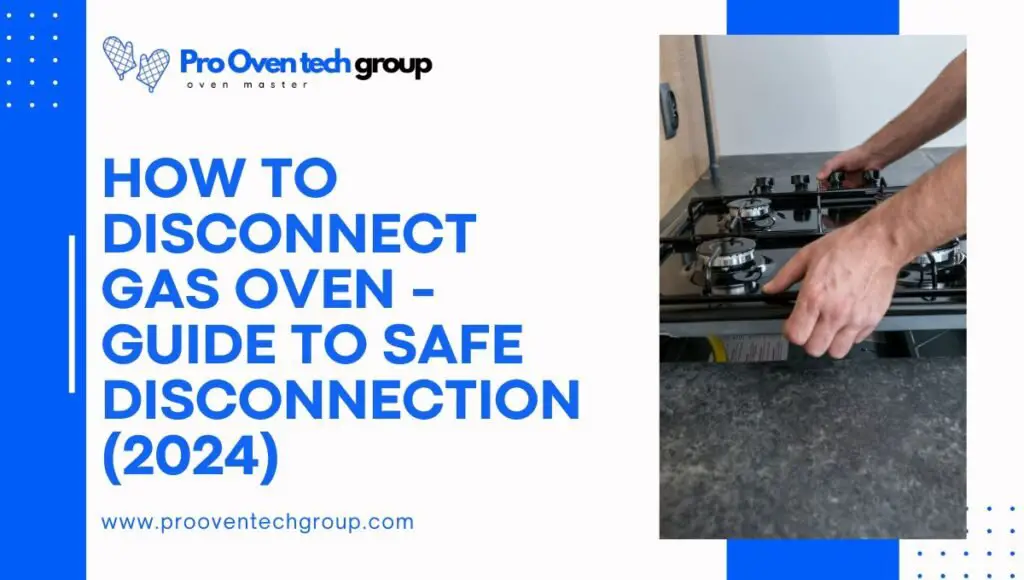
How to disconnect gas oven? Disconnecting a gas oven is a task that might seem daunting at first, but with the right instructions and precautions, it can be done safely and efficiently. This process involves a few critical steps to ensure your safety and the functionality of the oven once it’s reconnected. It’s essential to approach this task with caution, as working with gas appliances requires attentiveness to detail and respect for the inherent risks.
The key to successfully disconnecting a gas oven lies in following a systematic approach – first, ensuring the gas supply is completely shut off, then disconnecting the oven from the gas line, and finally, securing the gas line to prevent any leaks. Each step of the process must be handled with care to ensure a safe disconnection.
By the end of this guide, you will be equipped with the knowledge not only to disconnect your gas oven safely but also to understand the precautions necessary to prevent any issues during the process. Whether you’re moving, remodeling your kitchen, or replacing your oven, this guide will assist you every step of the way.
Table of Contents
What initial steps ensure safety?
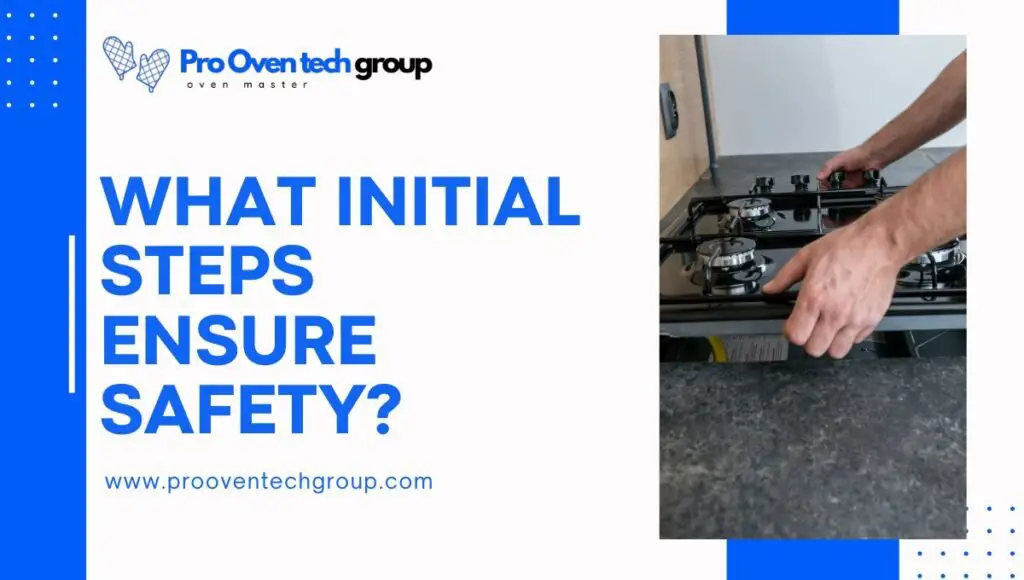
Ensuring safety is paramount when disconnecting a gas oven. Begin by gathering necessary tools, such as a wrench and leak detection solution, and ensure the area is well-ventilated. Inform all household members of the process to avoid accidental gas flow reactivation.
Gather Necessary Tools
Before starting, collect all tools and safety equipment you will need. This includes a wrench for loosening the gas line connector, leak detection solution to spot any gas leaks after disconnecting, and safety gloves to protect your hands.
Ventilate the Area
Ensure the room is well-ventilated to prevent gas accumulation. Open windows and doors to allow fresh air to circulate, reducing the risk of gas inhalation or potential fire hazards associated with gas build-up.
Inform Household Members
Communicate with everyone in the home about your plan to disconnect the gas oven. This ensures no one inadvertently turns the gas supply back on while you’re working, which could lead to gas leaks or accidents.
How to shut off gas supply?
Shutting off the gas supply is crucial to safely disconnect a gas oven. It prevents the risk of gas leaks and ensures a safe environment to work in. To accomplish this step effectively, follow the detailed instructions below.
Locate the Gas Valve
- Find the gas valve behind the oven.
- The valve is usually within arm’s reach.
- Look for a metal pipe leading to the oven.
- It might be covered or somewhat hidden.
- Ensure clear access to the valve before proceeding.
Turn Off the Valve
- Rotate the valve handle clockwise to close.
- Stop when the handle is perpendicular to the pipe.
- Do not force the handle; it should turn easily.
- If stuck, do not apply excessive force; seek help.
- Confirm the valve is fully closed and secure.
Test for Gas Flow
- Use a gas leak detector for accuracy.
- No bubbles or hissing should be present.
- Listen carefully for any sign of gas escape.
- Repeat the test to ensure complete shut-off.
- Safety first: If in doubt, consult a professional.
What is the correct disconnection procedure?
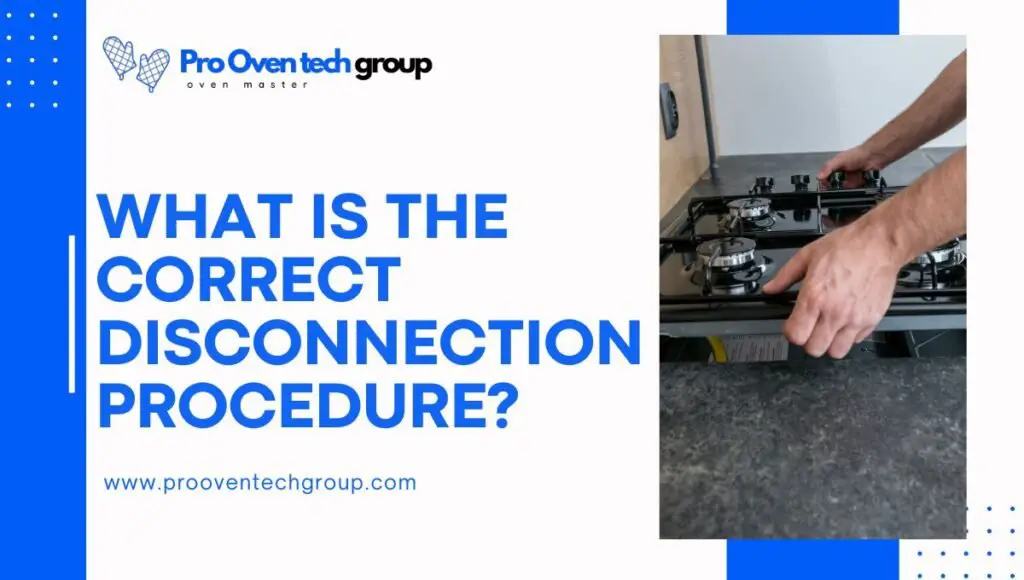
Disconnecting your gas oven correctly is a crucial step that ensures the safety of your home and family. This process involves carefully detaching the oven from the gas supply to avoid any risks of gas leaks or accidents. It’s a task that requires patience, precision, and adherence to safety guidelines.
Step 1: Unplug the Oven
- Ensure the oven is completely powered off.
- Carefully unplug the oven from its electrical outlet.
- This prevents any electrical hazards during disconnection.
- Keep the power cord secure and away from the work area.
Step 2: Loosen the Gas Connector
- Locate the gas connector behind the oven.
- Using a wrench, gently loosen the connector.
- It’s important not to apply too much force.
- Keep the connection parts safe for later reattachment.
Step 3: Detach the Oven from Gas Line
- Slowly pull the oven away from the wall.
- As you do so, guide the gas connector out safely.
- Ensure no strain is put on the gas line.
- Maintain a steady, controlled movement to avoid damage.
Step 4: Cap the Gas Line
- Once disconnected, cap the gas line securely.
- This prevents any gas leakage post-disconnection.
- A cap or plug specifically designed for gas lines is necessary.
- Check for any gas escape using a gas leak detector.
How to Secure the Gas Line?
Securing the gas line after disconnecting your oven is a critical step to ensure your safety and that of your home. Here are five friendly points to help you through this process:
- Use the Right Cap or Plug: Ensure you use a cap or plug specifically designed for gas lines. This guarantees a tight fit, reducing the risk of leaks. They’re easily found at local hardware stores and come with instructions for proper installation.
- Double-Check the Seal: After capping the line, double-check to make sure the seal is tight and secure. You don’t want any gas sneaking out. A gentle tug on the cap can reassure you that it’s properly affixed.
- Apply Leak Detection Solution: It’s always a smart move to apply a gas leak detection solution around the cap. This will show bubbles if there’s any gas escaping. It’s a simple yet effective way to ensure everything is sealed tight.
- Keep the Area Ventilated: Even after securing the gas line, keep the kitchen or work area ventilated for a while. This ensures any residual gas dissipates safely, keeping the air in your home clean and safe to breathe.
- Regular Checks: It’s a good idea to check on the gas line periodically, especially before using the oven again. Quick checks can prevent potential issues down the line and ensure your kitchen remains a safe environment.
What precautions prevent issues?
Taking precautions is essential in preventing gas-related issues when disconnecting your oven. Stay attentive and follow safety guidelines to ensure a risk-free environment.
- Be Cautious of Surroundings: Keep the work area clear of flammable materials.
- Wear Protective Gear: Gloves and safety glasses are your friends.
- Communicate Clearly: Make sure everyone in the household is informed about the disconnection.
- Avoid Rushing: Take your time to ensure each step is done correctly.
- Use Quality Tools: Investing in the right tools can prevent accidents.
- Follow Instructions Carefully: Double-check steps if you’re unsure.
- Seek Professional Help if Needed: Don’t hesitate to call an expert for guidance.
How to reassess safety post-disconnection?
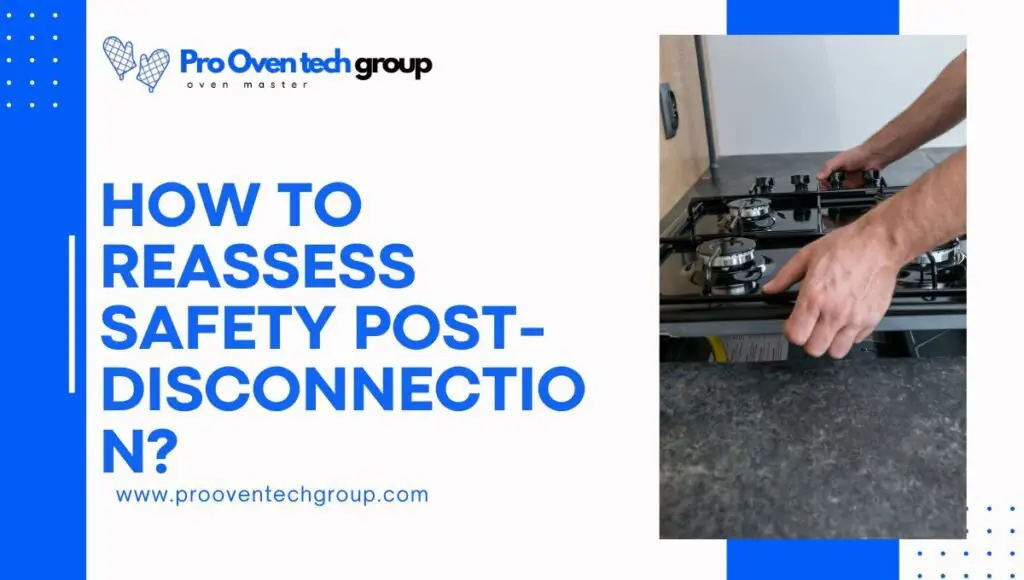
Reassessing safety after disconnecting your gas oven is vital. It ensures that all precautions have been successfully undertaken and that your environment remains secure and hazard-free. Proper assessment mitigates the risk of gas leaks and ensures the disconnection process leaves no dangerous vulnerabilities.
- Wait a few moments for gas odors to dissipate.
- Visually inspect the area for loose connections or damage.
- Use a gas leak detector around the capped line.
- Ensure proper ventilation in the work area continues.
- Check that all tools are removed from the vicinity.
- Reconfirm that the gas valve remains in the off position.
- Inform household members the disconnection is complete and safe.
- Schedule a periodic check-up for the gas line and connections.
In summary, performing a thorough reassessment of safety post-disconnection is crucial for maintaining a secure environment. It’s a simple but effective way to safeguard your home against potential hazards.
Conclusion How to disconnect gas oven
In wrapping up, we’ve taken a detailed walk through the safe disconnection and securing process of your gas oven—a crucial task that’s all about ensuring the safety and tranquility of your home. While it might seem daunting at first, following these steps can turn it into a manageable and even empowering DIY project.
Remember, your vigilance is the key to a safe kitchen. Don’t hesitate to reach out to a professional if you’re unsure at any point. Keeping your home safe is a task well worth the time and effort.
FAQS
Q1. Who can disconnect a gas stove?
A1. In most cases, a licensed gas technician should disconnect a gas stove. However, if you have experience and feel confident in doing it yourself, follow the necessary safety precautions.
Q2. Do I need a plumber to disconnect a gas stove?
A2. No, a licensed gas technician can also disconnect a gas stove. However, it’s recommended to hire a professional to avoid any potential risks or hazards.
Q3. Can I disconnect my gas stove myself?
A3. It’s recommended to hire a professional for safety reasons. If you choose to do it yourself, make sure to follow all safety precautions and guidelines. Remember, your safety should always come first.
Q4. Gas cooker removal and installation?
A4. If you’re seeking to replace your gas cooker, it’s essential to have it removed and installed by a licensed technician. This ensures proper installation and minimizes the risk of potential hazards.
Q5. How to disconnect gas oven from wall?
A5. To disconnect a gas oven from the wall, follow these steps:
1. Turn off the gas supply valve behind the oven.
2. Remove the cap or plug covering the gas line connection.
3. Disconnect the gas line using a wrench.
4. Cap the line securely to prevent leaks.
5. Double-check for any loosened connections or damage.